Getting VSCode C++ to work on MacOS
Connecting Clang/C++ compiler to VSCode (macOS)
This is a short post meant to step through the steps needed to get Visual Studio code (macOS) to use your clang c++ compiler to build your cpp code.
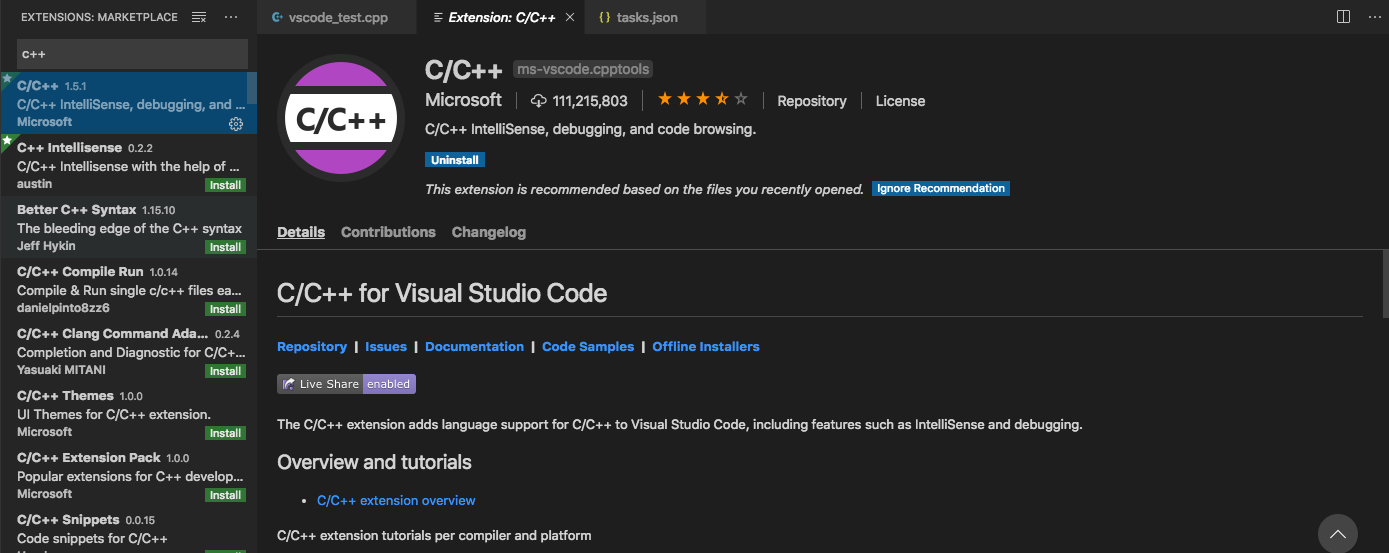
Making sure you have support for c++
You may encounter that you don’t have any formatting colors or other options for any c++ code you write, so as a first step we suggest you install the C++ extension.

You may also need to install clang if you haven’t already. You can do this by running xcode-select --install in your terminal.
Writing up sample .cpp

After with a fresh sample .cpp file in an open editor. If you want to copy and paste:
#include <iostream>
using namespace std;

int main(){
    int x = 3;
    while (x >= 1) {
        cout << "lorem" << endl;
        cout << "ipsum";
        cout << "do re mi ";
        cout << "fa" << endl;
        x--;
    }

    return 0;
}
Building the .cpp
Next we need to give VSCode some instructions for how to actually “build” our code. We do this by specifying commands and instructions through a tasks.json file. When you go to Terminal -> Run Build Task you will be presented with a search bar and a result saying there is no build task. We will configure this to add a build command.

This will open a tasks.json file that is empty. Here is my tasks.json file contents:
{
        // See https://go.microsoft.com/fwlink/?LinkId=733558
        // for the documentation about the tasks.json format
        "version": "2.0.0",
        "tasks": [
          {
            "type": "shell",
            "label": "clang++ build active file",
            "command": "/usr/bin/clang++",
            "args": [
              "-std=c++17",
              "-stdlib=libc++",
              //"-v",
              "-g",
              "${file}",
              "-o",
              "${fileDirname}/${fileBasenameNoExtension}"
            ],
            "options": {
              "cwd": "${workspaceFolder}"
            },
            "problemMatcher": {
                "owner": "cpp",
                "fileLocation": ["relative", "${workspaceFolder}"],
                "pattern": {
                  "regexp": "^(.*):(\\d+):(\\d+):\\s+(warning|error):\\s+(.*)$",
                  "file": 1,
                  "line": 2,
                  "column": 3,
                  "severity": 4,
                  "message": 5
                }
              },
            "group": {
              "kind": "build",
              "isDefault": true
            }
          }
        ]
      }
Actually Building!
Now we can try to run the build task again:

We get a terminal at the bottom reporting that the build task was run successfully.
###Just regularly compiling
If you wanted to skip the “build task” setup step and just jump to compiling via the terminal yourself, you can use clang like you would use gcc/g++: clang++ vscode_test.cpp -o vscode_test
Running the code
Depending on how you specify your tasks in tasks.json you can determine where the compiled code will go. In this example it stays in the same workspace directory, so we can run ./vscode_test directly.

There you go!
Enjoy Reading This Article?
Here are some more articles you might like to read next: