Recovering MySQL data from .MYI, .MYD, .FRM files
Recovering MySQL data from .MYI, .MYD, .FRM files
###Summary
- Identifying the hexdump of the version number of the .frm file
- Installing that version of MySQL https://downloads.mysql.com/archives/community/
- Starting it up
- Resetting the password
- Creating a new database
- Moving the data to that database folder
- using mysqldump to dump the data to a CSV format
What version of MySQL to install?
Drawing inspiration from the percona blog, as long as the version is old enough, you can make use of the hexdump command to identify what version of MySQL to install.
Execute the following hexdump call to look at the first two bytes of the .frm file (the version number is stored at a 0x33 offset): hexdump -s 0x33 -n 2 -v -d /var/lib/mysql/tweetdata/tweets.frm
For our data we got the following result:
0000033   50704
0000035
Which suggests that we should install version 5.7.4 as that must have been the last version that the table was built / altered on.
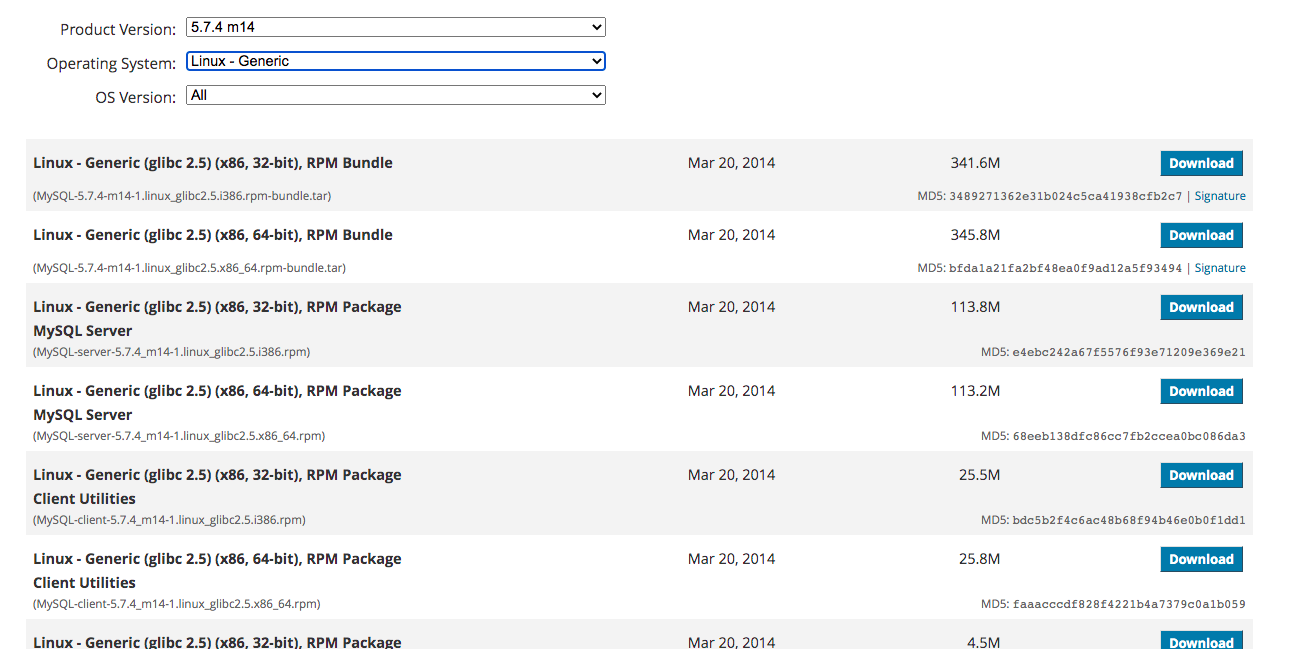
###Downloading MySQL If you need to download an older version of MySQL you can navigate to this archive page:

We downloaded the .tar ball for the RPM bundle (345 M at the top).
###Installing
After downloading the tar ball we extract and run sudo yum localinstall MySQL-shared-5.7.4_m14-1.linux_glibc2.5.x86_64.rpm
on each of the .rpm files you need (for us this was the server, client, and shared).
Since we are using version 5.7.4 we can call mysql_install_db to do some heavy lifting in setup:
mysql_install_db --user=mysql \
         --basedir=/opt/mysql/mysql \
         --datadir=/opt/mysql/mysql/data
Now you can copy your .FRM, .MYD, .MYI files into your data directory!
Starting up
If your installation includes mysqld_safe run:
mysqld_safe --user=mysql &
You may also be able to run: systemctl start mysqld
Access the server with the client: mysql -u root -p
You will have to reset your password, and if it doesn’t prompt you already you can try:
SET PASSWORD FOR 'root'@'localhost' = PASSWORD('New_Password');
You can then create a new database which will create a database folder in the data directory we passed to mysql_install_db. After copying the .FRM, .MYD, .MYI files into that directory you should be able to see a table within that directory!
Dumping the data to CSV
Finally, once the table is available, you can call mysqldump to dump the data to csv:
mysqldump -u [username] -p -t -T/path/to/directory [database] [tableName] --fields-terminated-by=,
By default it may not give you column names, which wasn’t really a problem for us, but if you need column names, there are alternate ways to dump the data that may work for you.
Hope that helps!
Enjoy Reading This Article?
Here are some more articles you might like to read next: